WordPress for Beginners – An Overview of the WordPress Admin Section
WordPress is an incredibly powerful tool and is very easy to work with. But like any technology it can be difficult to grasp. This short guide on WordPress for Beginners will help break through that initial boundary of learning your way around the WordPress admin section.
Logging in
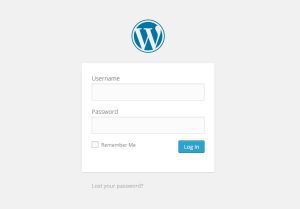
 To access the WordPress Admin site, you’ll first need to log in to your WordPress site. You can get to the login page (see figure 1) by adding /wp-admin to the end of your sites URL in your browser window (example: http://YourSite.com/wp-admin). Once you’ve logged into your site you’ll be in the WordPress Admin site where you can edit your website.
The Difference between Posts and Pages
On the left of your WordPress Admin site you’ll find the site navigation. In it you’ll find links for both Posts and Pages, there are very key differences between each.
Posts are what your blog uses as entries. They are listed on your blog in reverse chronological order and can be found in the Archives, Categories, Recent Posts, and other widgets of your blog. They are also displayed in the RSS feed of your blog.
Pages are your sites webpages. They are static and are not listed by date. Pages also do not use tags or categories.
Creating a New WordPress Post
To create a Post, first click on the link labeled “Posts” in your WordPress Admin site navigation, this will open up the Posts page (see figure 2). At the top of this page (next to the word “Posts”) you’ll see a button labeled “Add New”, click on it to create a new Post.
 The first thing you’ll want to do when creating a new Post is give your Post a title. Try to come up with something that will peak your readers interest. Creating the title for your Post will also allow WordPress to automatically create the Post’s URL based on the title you give it (see figure 2a).
![]()
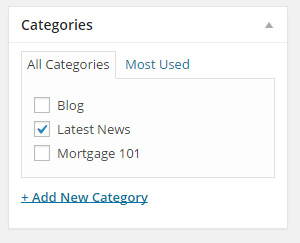
 Next you’ll want to select the categories you want the Post to appear in. This will allow your readers to easily find articles that interest them. You can do this by adding a check next to the category’s name in the Categories window on the right of your page (see figure 2b).
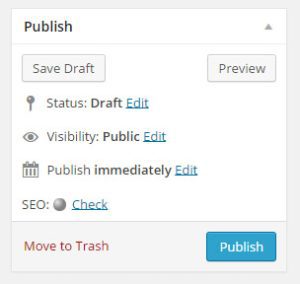
After that write your blog Post! You can add images by clicking on the “Add Media” button. Once you’re done, you can choose one of the following options from the Publish window (see figure 3a) on the right of your page:
- Preview your blog Post by clicking on the Preview button
- Publish your blog Post for the world to see by clicking on the Publish button
- Publish your blog Post for only select people to see by editing the Visibility of the Post from Public to Private or Password Protected
Editing a WordPress Post
To edit a Post, simply go to the Posts page by clicking on the link labeled “Posts” in your WordPress Admin site navigation and click on the Post you wish to edit’s title.
Creating a New WordPress Page
To create a Page, first click on the link labeled “Pages” in your WordPress Admin site navigation, this will open up the Pages page (see figure 3). At the top of this page (next to the word “Pages”) you’ll see a button labeled “Add New”, click on it to create a new Page.
 The first thing you’ll want to do when creating a new Page is give your Page a title. Creating the title for your Page will allow WordPress to automatically create the Page’s URL based on the title you give it.
Next you’ll want to let WordPress know if this Page is a Parent Page (there are no Pages above it in your sites Page hierarchy) or a Sub Page (The Page has a Parent). You can select a Parent in the Page Attributes window to the right of your page.
After that write your Page’s content! You can add images by clicking on the “Add Media” button. Once you’re done, you can choose one of the following options from the Publish window (see figure 3a) on the right of your page:
- Preview your Page by clicking on the Preview button
- Publish your Page by clicking on the Publish button
- Publish your Page for only select people to see by editing the Visibility of the Post from Public to Private or Password Protected
Editing a WordPress Page
To edit a Page, simply go to the Pages page by clicking on the link labeled “Pages” in your WordPress Admin site navigation and click on the Page you wish to edit’s title.
Adding an Item to the Menu
In order to add a page to your site’s menus, hover over the link labeled “Appearance” in your WordPress Admin site navigation. This will cause a list of option links will appear, click on the link labeled “Menus.” This will open up the Edit Menus page (see figure 4).


To the left of the Menu Structure window you’ll see a list of tabs, one of the tabs is labeled “Pages,” click on it (see figure 4a). This will open a list of all the pages you’ve created for your site. Simply add a check next to the pages want to add to this menu then click on the button labeled “Add to Menu.”
If you want to change the order of your menu items or make them a sub menu item, simply drag and drop the menu item into the correct order in the Menu Structure window. You can also change the name of the menu item by clicking on the word page to the right of the menu item’s name. This will expand the menu item, then edit the name in the Navigation Label.
Once you’re done, always be sure to click on the button labeled “Save Menu.” This can be found in the upper right corner of the Menu Structure window.
Drop Us a Line
It’s time to find some inspiring ideas for you!


